


September 18, 2020
Exceptional skin thanks to Illamasqua, a few random makeup tips I've acquired and my Labor Day beauty bender.


Excerpts:
This new product restored my faith in foundation
Foundation has been one of the least-used products in my makeup drawer for years, as I rarely have any reason to wear anything more than a tinted moisturizer or oil. The last one I purchased was Charlotte Tilbury’s Light Wonder (a few years ago), and although it would do the trick when I was going out or had a meeting (remember those days?), I started to notice I needed a bit more coverage to even everything out. Then the pandemic happened and this was literally the least of my problems.
Last week I “attended” a virtual masterclass hosted by Illamasqua to celebrate the launch of their brand-new Beyond Foundation. Excited to spend an hour with Illamasqua’s Global Director of Artistry, Pablo Rodriguez, I propped my laptop up on my vanity, laid out all the goodies the brand sent along beforehand, washed my face and got ready to play.

The foundation was obviously the focus, and I received several options a few days earlier so I could find the perfect match—and it was actually super-easy thanks to Illamasqua’s 3-step shading system. The 25 shades of Beyond Foundation are divided into Light, Medium and Dark. Within these categories there are three undertones including Golden (G), Rose (R) and Neutral (N), and each undertone has three levels of color (1, 2 and 3). In case you’re curious, my shade is LN3.
We started with the Hydra Veil Primer, which has a cool jelly-like consistency—and I love the packaging’s interior flip-up lid that has a holder for a small spatula. (I never know what to do with the little scoops that come with products. They either usually wind up getting lost or tossed.) Then, with my fine lines and pores blurred and texture significantly smoothed, it was time for the star of the show.
This foundation is all about hydration and radiance (who isn’t?), and the vegan, cruelty-free formula features hyaluronic acid for mega-moisture and vitamin E for antioxidant benefits. And once we got going I learned a few valuable foundation tips from Rodriguez along the way.
Try applying your primer with your foundation brush. A little extra primer on there when you get to your foundation enhances application and helps skin look extra juicy.
For more coverage, use a flat, compact foundation brush.
For a sheerer finish, use a round, fluffy brush to apply.
Mix a drop of Beyond Liquid Highlighter with your foundation on the back of your hand before applying for a beyond-otherworldly glow. (I have the “OMG” shade and it lives up to its name.)
From there we played around with concealer, powder, highlighter and contouring. The most intriguing product I received in my package was the Gel Sculpt, which honestly scared me when I first opened it up. Yes, it is insanely dark, but the color is actually super-subtle when you swipe it over your skin. (Kind of like Clinique’s “Black Honey” lipstick—which I still have BTW.)

Rodriquez served up three different looks, so I basically just layered them over each other, and here’s the end result… I absolutely love it because my skin looks fresh, even and radiant but not the slightest bit overdone. In fact, I love it so much I actually applied it before taking my son to the orthodontist yesterday—and that really means something.

A few super-easy mid-week makeup tips
We may not be getting all glammed up these days, but it’s still nice to put on a little makeup every few days (and I’m sure my family appreciates it as well). I’m not talking about anything crazy—just a little Kosas Tinted Oil, a touch of bronzer, a light cream eyeshadow, mascara and a bit of cheek color.
This streamlined routine can get a little boring, so I’ve been trying to keep things interesting—and I got a great tip from a Gucci Westman tutorial the other day (which made me buy the Super Loaded Tinted Highlight in “Peau de Soleil,” I can’t wait until it arrives!). We usually use highlighter as a finishing touch after bronzer (at least I do), but you can get a more subtle result by applying your highlighter first. Not only does this dial-down the shimmer to an acceptable work-from-home/not-going-anywhere level, your subsequent bronzer application provides a little extra blending. And think beyond your cheekbones and pop a little on your eyelids as well. Trust me, try it.

Another recent discovery pertains to my brows—which I haven’t really been fixating on despite the fact that January 30 was the last time I got them done. (Isn’t that crazy?) I’m so accustomed to brushing my brows outward (which I always do after applying my morning skincare), but for some reason I tried brushing them in the opposite direction and I loved the result.
Basically a way of using 7+ months of growth to my advantage (I regularly pluck stray hairs but I haven’t trimmed them or done anything else), this new approach makes my brows look fluffier and fuller, and thicker at the tail end. The only downside is that the ends look slightly sparse (upon close inspection) but that’s easily fixed with a few strokes of brow pencil.
Just remember, it’s the little things that keep every day interesting—and this includes your makeup. Have fun and play around a bit! What’s the worst thing that can happen? You wash your face and start all over again (or just ride it out until you wash your face at the end of the day).
My wild and crazy 2020 Labor Day weekend
I don’t know about you guys, but there wasn’t all that much going on this past weekend. I spend Saturday taking care of stuff around the house, Sunday in bed thanks to a massive allergy attack, and Monday feeling like I got hit by a truck but trying to get my sh*t together for the coming week.
So with my Saturday night wide open, I decided to multi-mask—but not in the form of applying three separate masks on different areas of my face at once. Instead, I did three back-to-back masks on my entire face. Yes, it took about an hour (not like I had anything else to do), but the results were resplendent and I really couldn’t think of a better use of my time.

First up was Savor Beauty’s Yuzu Lemonade Peel, which I love because it only requires 30 seconds. With a powerful punch of salicylic acid (take that maskne!) to help remove the uppermost layer of dead skin cells that makes your skin look dull (and acts as a roadblock that prevents other ingredients from getting into the skin) and brightening vitamin C courtesy of yuzu fruit, it’s a win-win for your skin. Yes, you most definitely feel the burn during this half-minute, but as I always say, “If it hurts it works.”
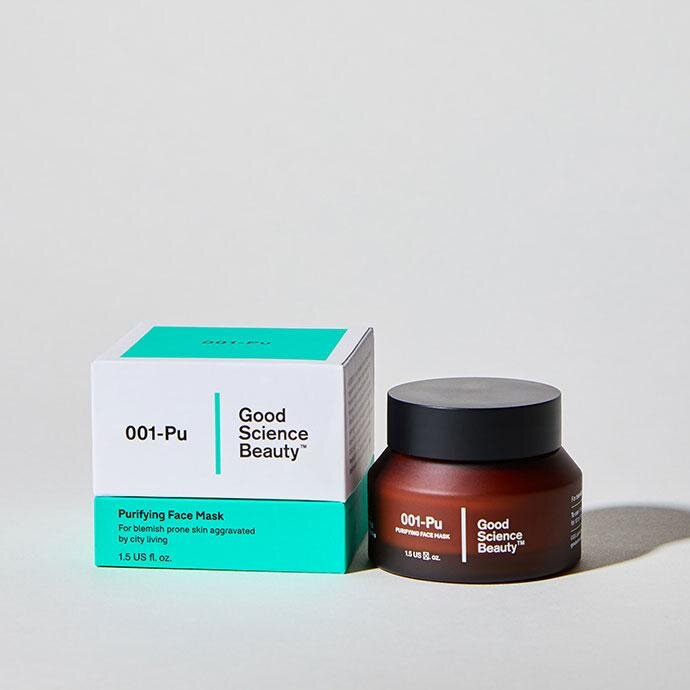
I followed this with Good Science Beauty’s 001-Pu Purifying Face Mask—because I need at the pore-purging I can get right now. I’ve noticed that my recent blemishes almost-always appear in areas that are obscured by a face mask—and are especially concentrated in spots that align with its borders. (Based on research and dermatologist interviews, this is likely due to friction.) After 15 minutes with this mask, the blackheads on and around my nose were gone, and I noticed a marked decrease in congestion everywhere.

I used Natura Bissé’s C+C Vitamin Souffle Mask as my final round for a little bit of extra firming, brightening and moisture—and I love the scent, which reminds me of baby aspirin. Designed to help repair damage caused by free radicals and boost collagen production—woo hoo!—you won’t believe how juicy and radiant your skin looks afterwards.
After this somewhat labor-intensive undertaking my overall complexion definitely looked refreshed and revitalized. I still have a few issues around my nose (which has been majorly affected by the whole mask-wearing thing) and two stubborn spots on my cheeks (which can definitely be attributed to PMS). No, it wasn’t the professional facial I so desperately need right now, but this mask trifecta was just the reboot my skin needed.